Hyper-V Creating and Configuring virtual machines
First of all we need to install Hyper-V from Server Manager -> Add Roles and Features.
Now after installing Hyper-V. Open it.
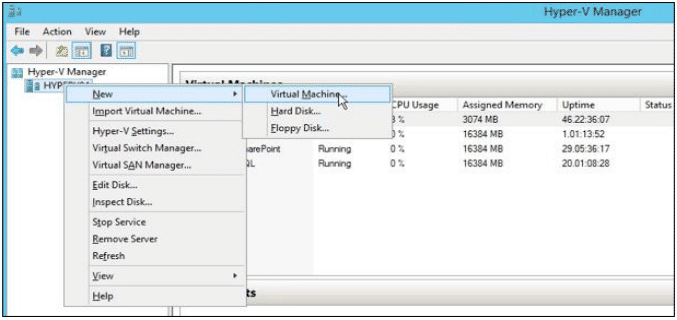
1- In Hyper-V manager, right click the Host and select New Virtual Machine.
2- Click Next
3- Name the VM something meaningful. We will use “Test VM” for this example. Click Next.
4- Select “Generation 1”, click Next.
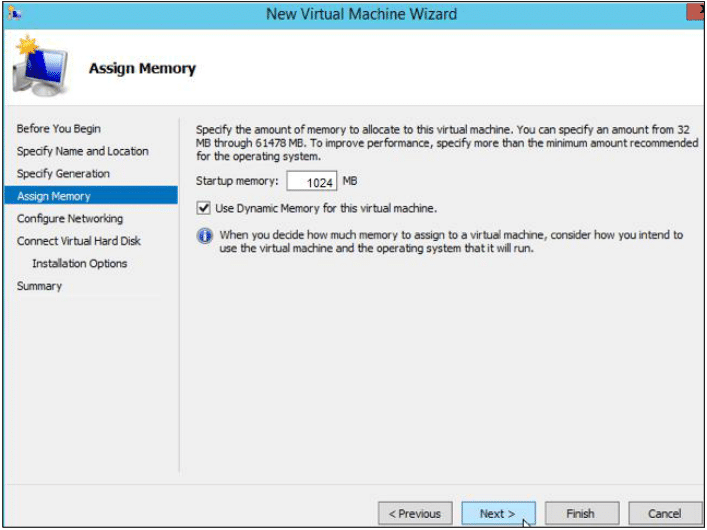
5- I give Startup memory 1GB. Check dynamic Memory and click next.
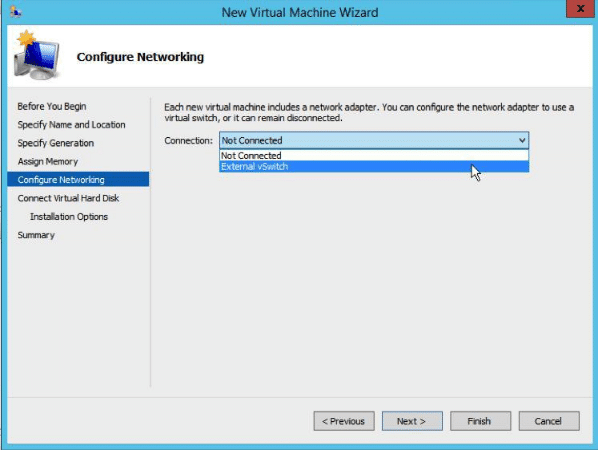
6- Configure the network as “External vSwitch”, click Next. This allows Test VM to access the internet and network.
Creating and Configuring virtual machine storage
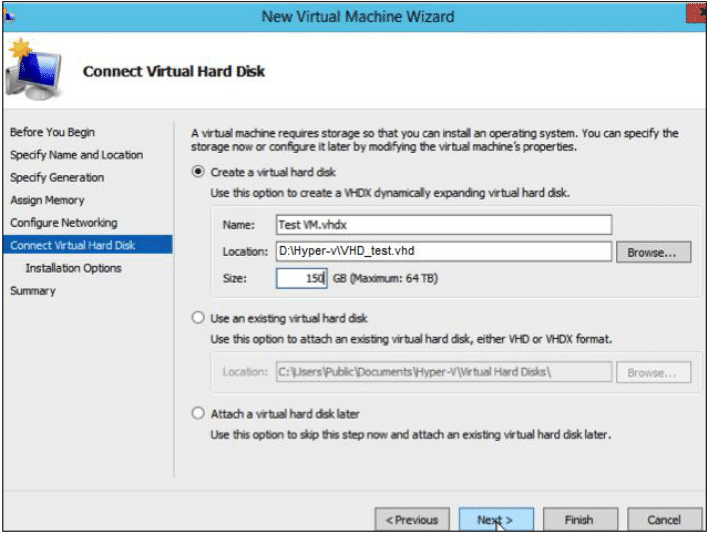
7- Ensure the “Create a virtual hard disk” radio button is selected and use the location where you want to store the VM virtual hard disk. The size should be at least 30GB for a Windows Server 2012 R2 Installation. Test VM will be set at 150GB. Click Next.
Hyper-V Creating and Configuring virtual machine - continue
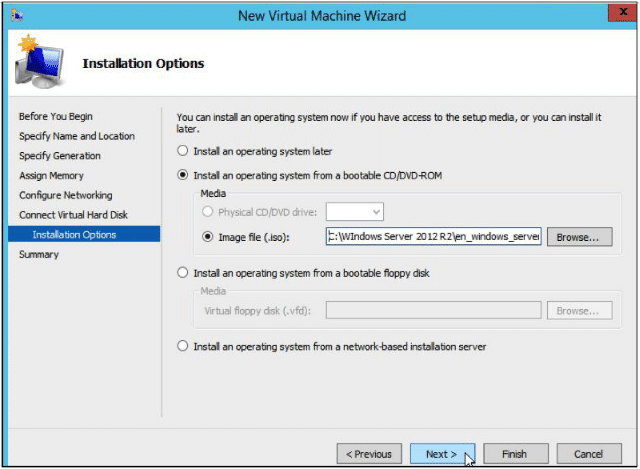
8- Under Installation options, select the second option, Install an operating system from a bootable CD/DVD-ROM and select Image file (.iso). Navigate to where the .iso file is located on the host machine or the network path, if installing from there. For Test VM, the Windows Server 2012R2 .iso is in the root of the C:\ drive on the host machine.
9- Click Next, then Finish.
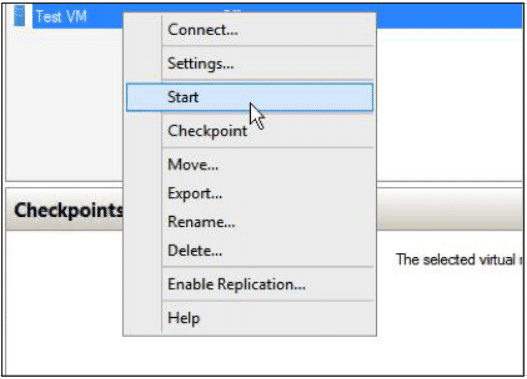
10- Once created, right click the newly created VM and select Start. Follow the on-screen instructions to install Windows on the VM.
Once Windows is installed, the VM must be configured.
i. Change the update settings to automatically install or as you want.
ii. Change the time zone to the appropriate location.
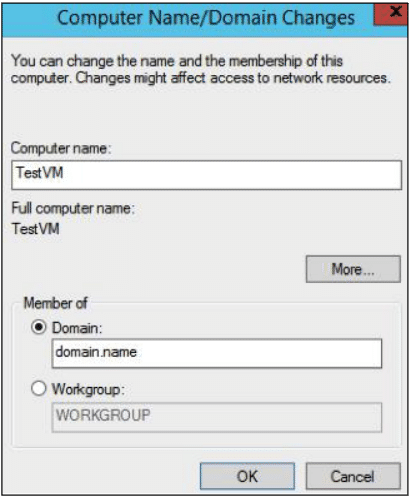
iii. Change the Computer Name to the name of the VM. Please note that a restart will be required.
If using a domain:
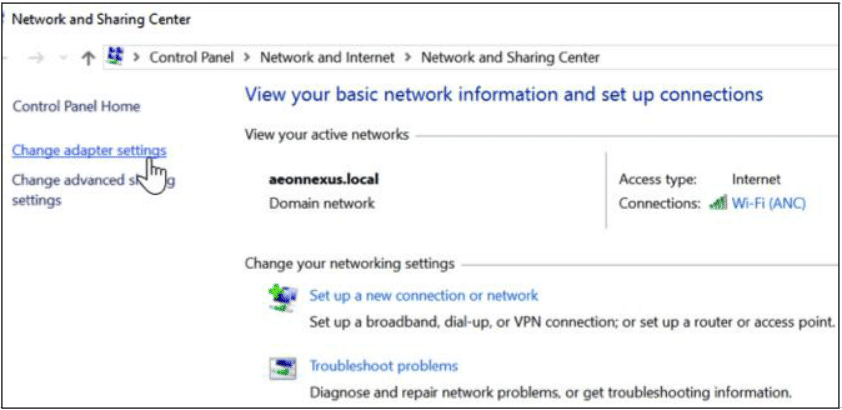
a. Open Network and Sharing Center.
b. Click Change adapter settings.
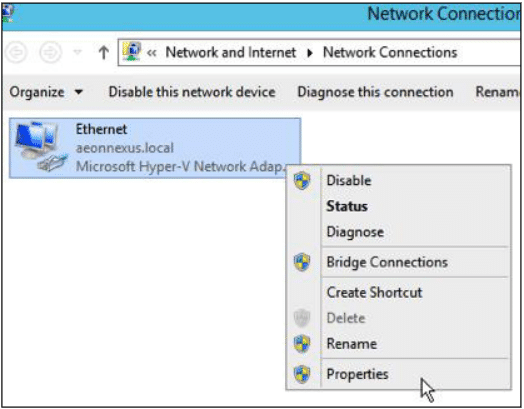
c. Right click Ethernet or External VSwitch and select Properties.
· Right click IPv4 and select Properties.
· Enter the IP address, subnet mask, default gateway and DNS.
· Click Apply, then close.
d. Disable the firewall for Domain Networks.
e. In local server, select WORKGROUP.
f. Click Change then select domain.
g. Enter Domain Name and Domain Admin Credentials. Please note that a restart will be required.
Creating and Configuring virtual machine Networks
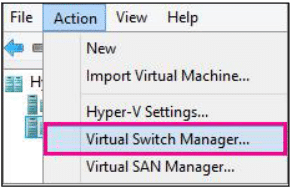
1- Open Hyper-V Manager, Right click on Host and select Virtual Switch Manager.
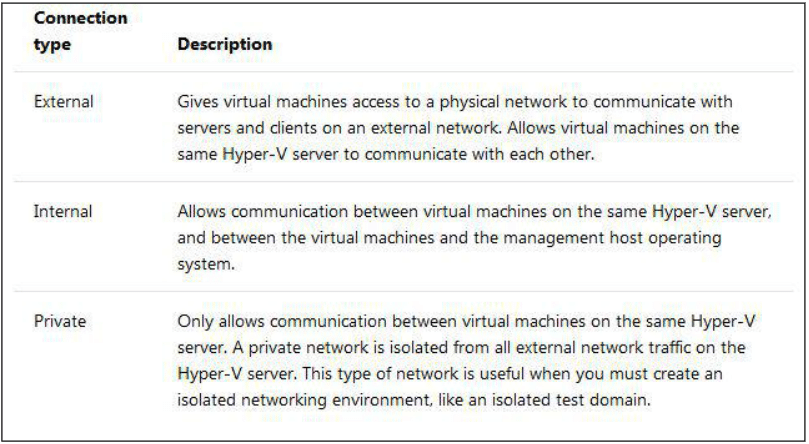
2- On this Window You can see three options for creating a virtual switch- Internal, External, Private. Select as you want by reading the description of all options. Here for Test VM, I select External virtual switch, and click Next.
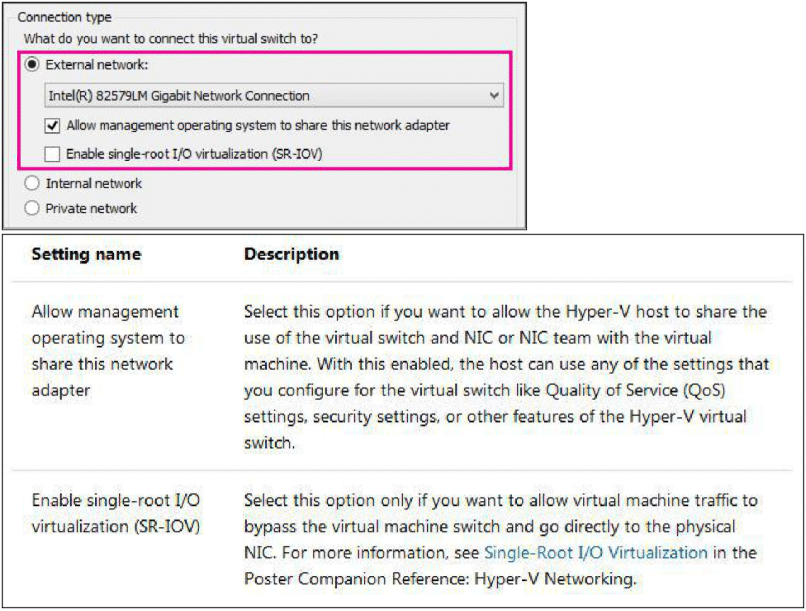
3- Now give a Name to the switch as Ext_Test and If you select External, choose the network adapter (NIC) that you want to use and any other options described in the following table. click Apply and Ok.
4- If you want to isolates network traffic from the management Hyper-V host operating system or other virtual machines that share the same virtual switch, select Enable virtual LAN identification for management operating system. You can change the VLAN ID to any number or leave the default. This is the virtual LAN identification number that the management operating system will use for all network communication through this virtual switch. For this I don’t wanted to this.

5- Click Ok Then Click Yes.
6- Now Virtual switch is ready for use. Connect the VM to this Switch as I connect on Network Configuring part and you also connect it by right click VM selecting setting of the VM and Networks. 7- This is all about Creating and configuring Virtual Machine on Hyper-V.
Get your FREE PDF on "100 Ways to Try ChatGPT Today"
Generating link, please wait for: 60 seconds
Post a comment
Comments
Join the conversation and share your thoughts! Leave the first comment.